From this documentation, you will learn how to create Public App and Private App
Public App
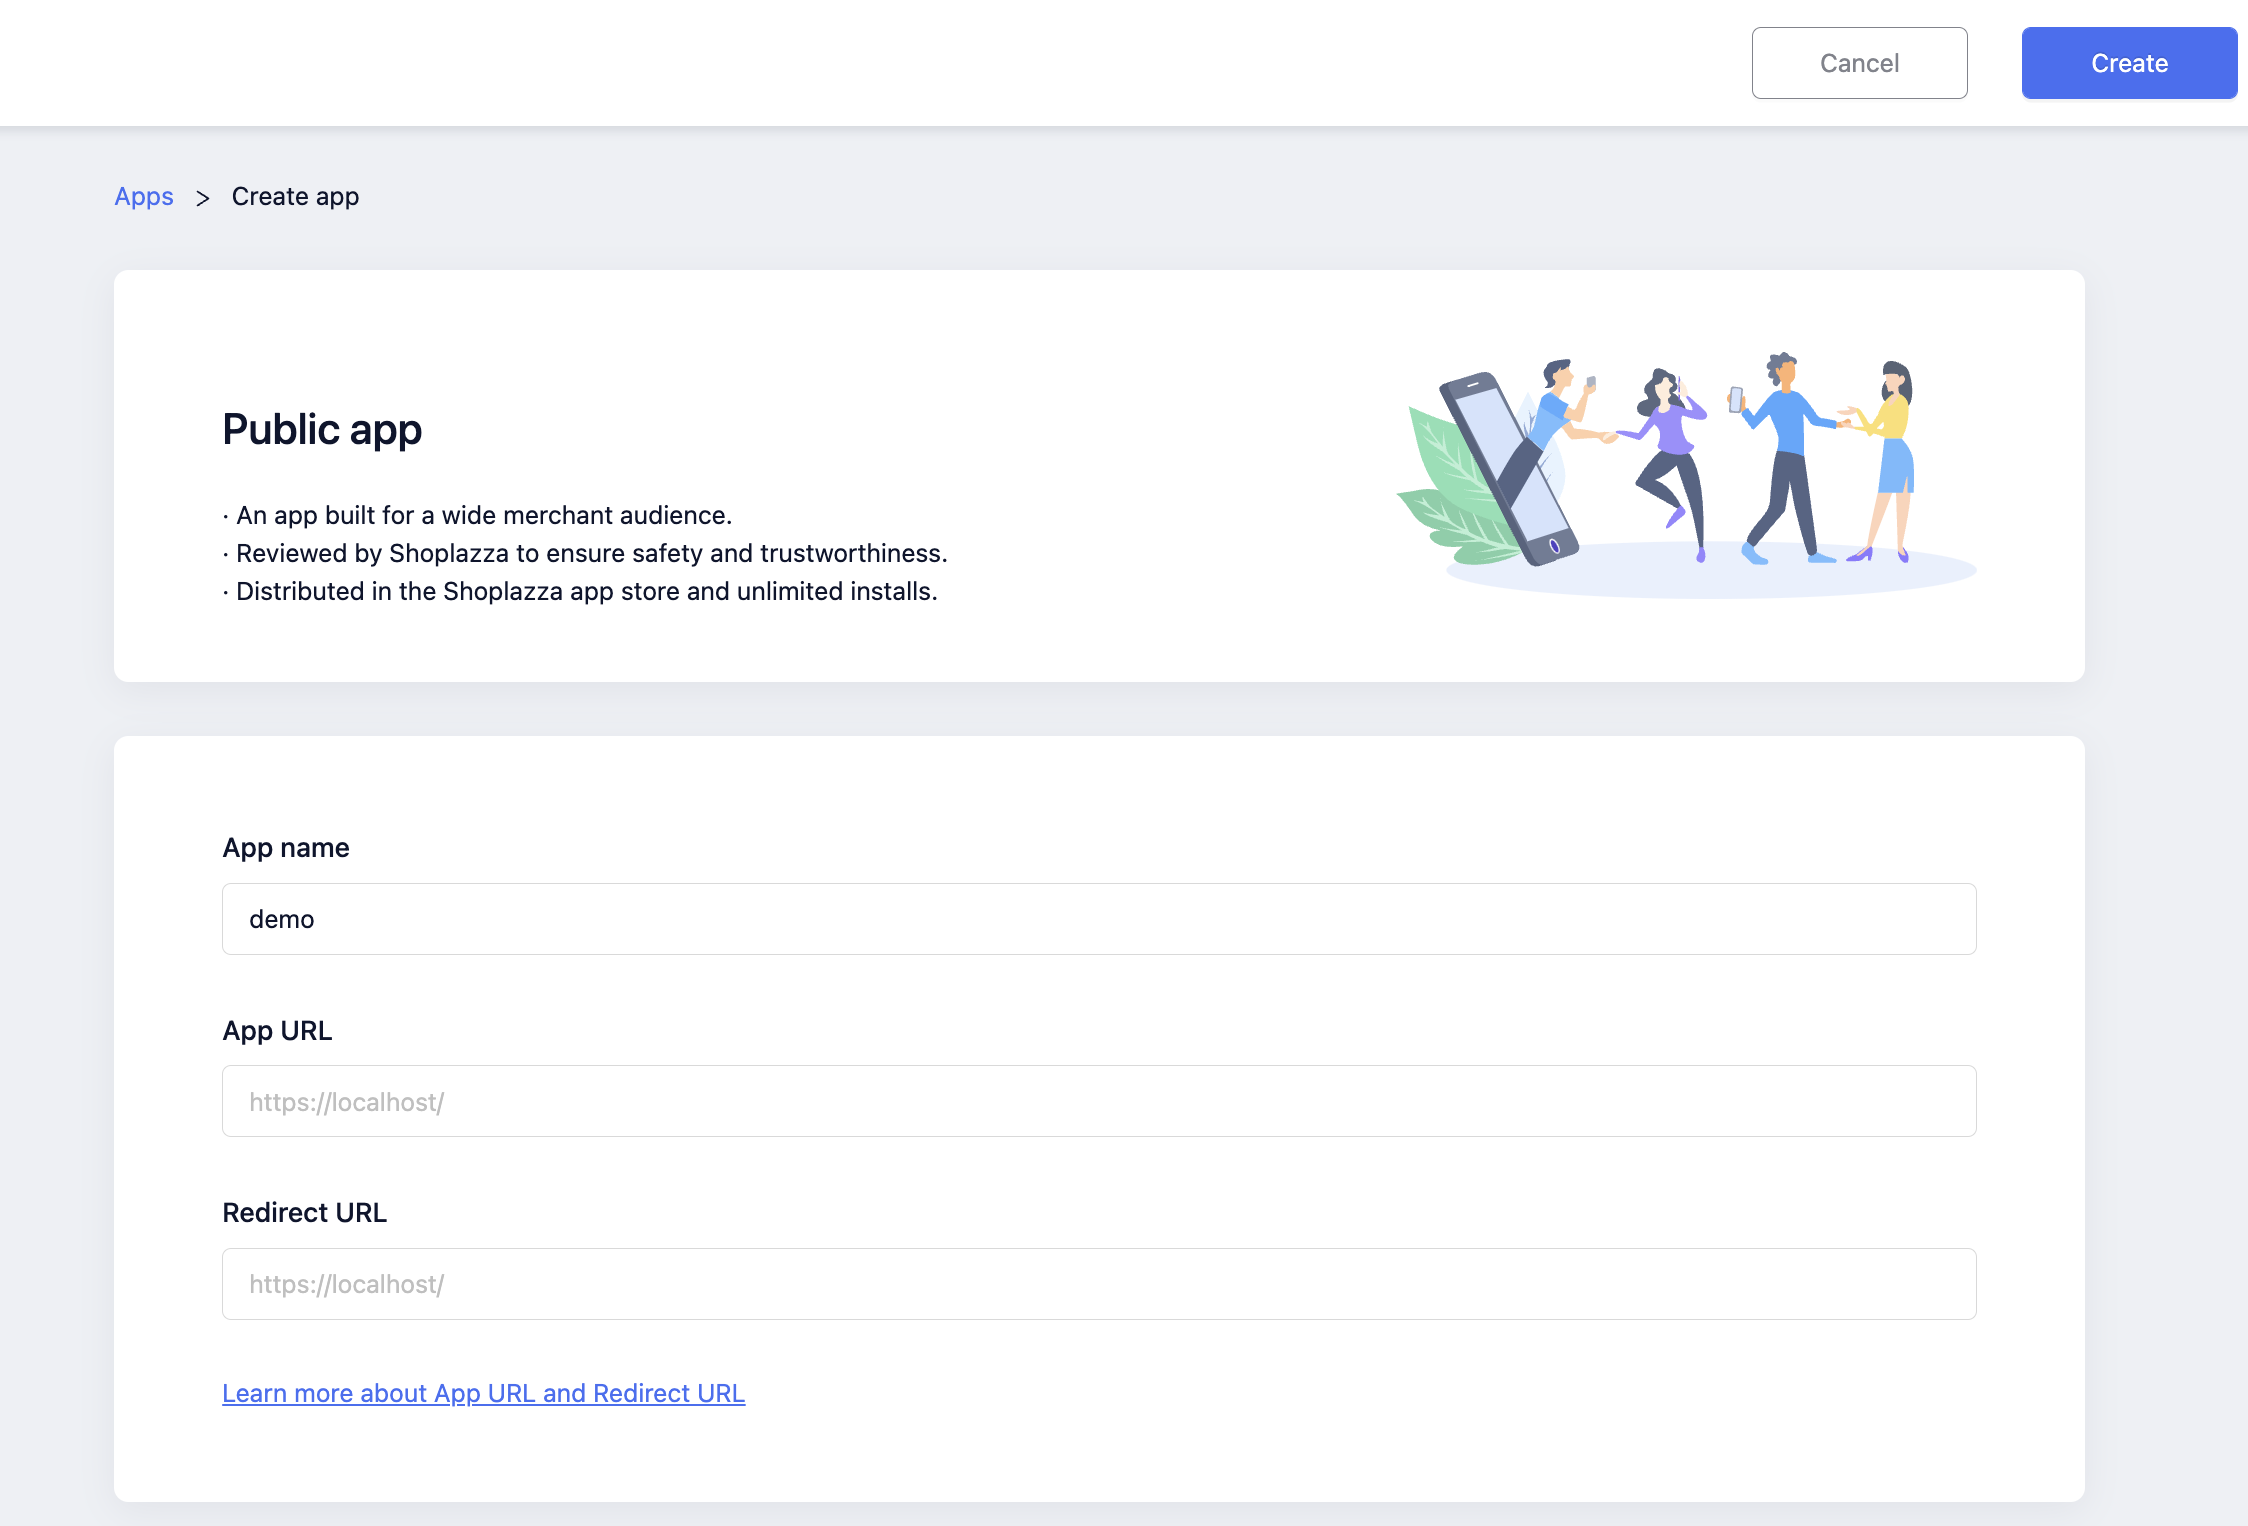
Shoplazza requires public app to complete OAuth authentication before they can use Shoplazza Open API. Therefore, before you start the public app development phase, you need complete the following steps to create an public app:
- Log in to Partner Center, if you don't have Shoplazza Partner Account, refer to this tutorial to know how to create an Shoplazza Partner Account.
- Click Apps.
- Click Create app.
- Enter the App name, App URL, and Redirection URLs for your app.
- Click Create.

Public app field definition
To create a public app you need to fill in the following information:
| Field | Definition | Use of |
|---|---|---|
| App Name | The name of the app | App Name will be displayed in the list of installed apps in Shoplazza Store Admin to help you to identify your app. |
| App URL | App's main service URL | Used in app installation process. When merchant install your app or enter the app, your app will receive a GET request to this App URL. You app needs to start the OAuth process after receives the GET request to install the app, whether the app installation process start from "Add App" on Shoplazza App Store or "Install app" on partner center dashboard. |
| Redirect URL | App's redirect URL | Used in app installation process. After permission is granted by merchants during the OAuth process, merchants are redirected to Redirect URL with OAuth code and other fields. |
Note
Public app must complete OAuth authentication before it can use Shoplazza Open API, refer to OAuth authentication to learn more.
Private App
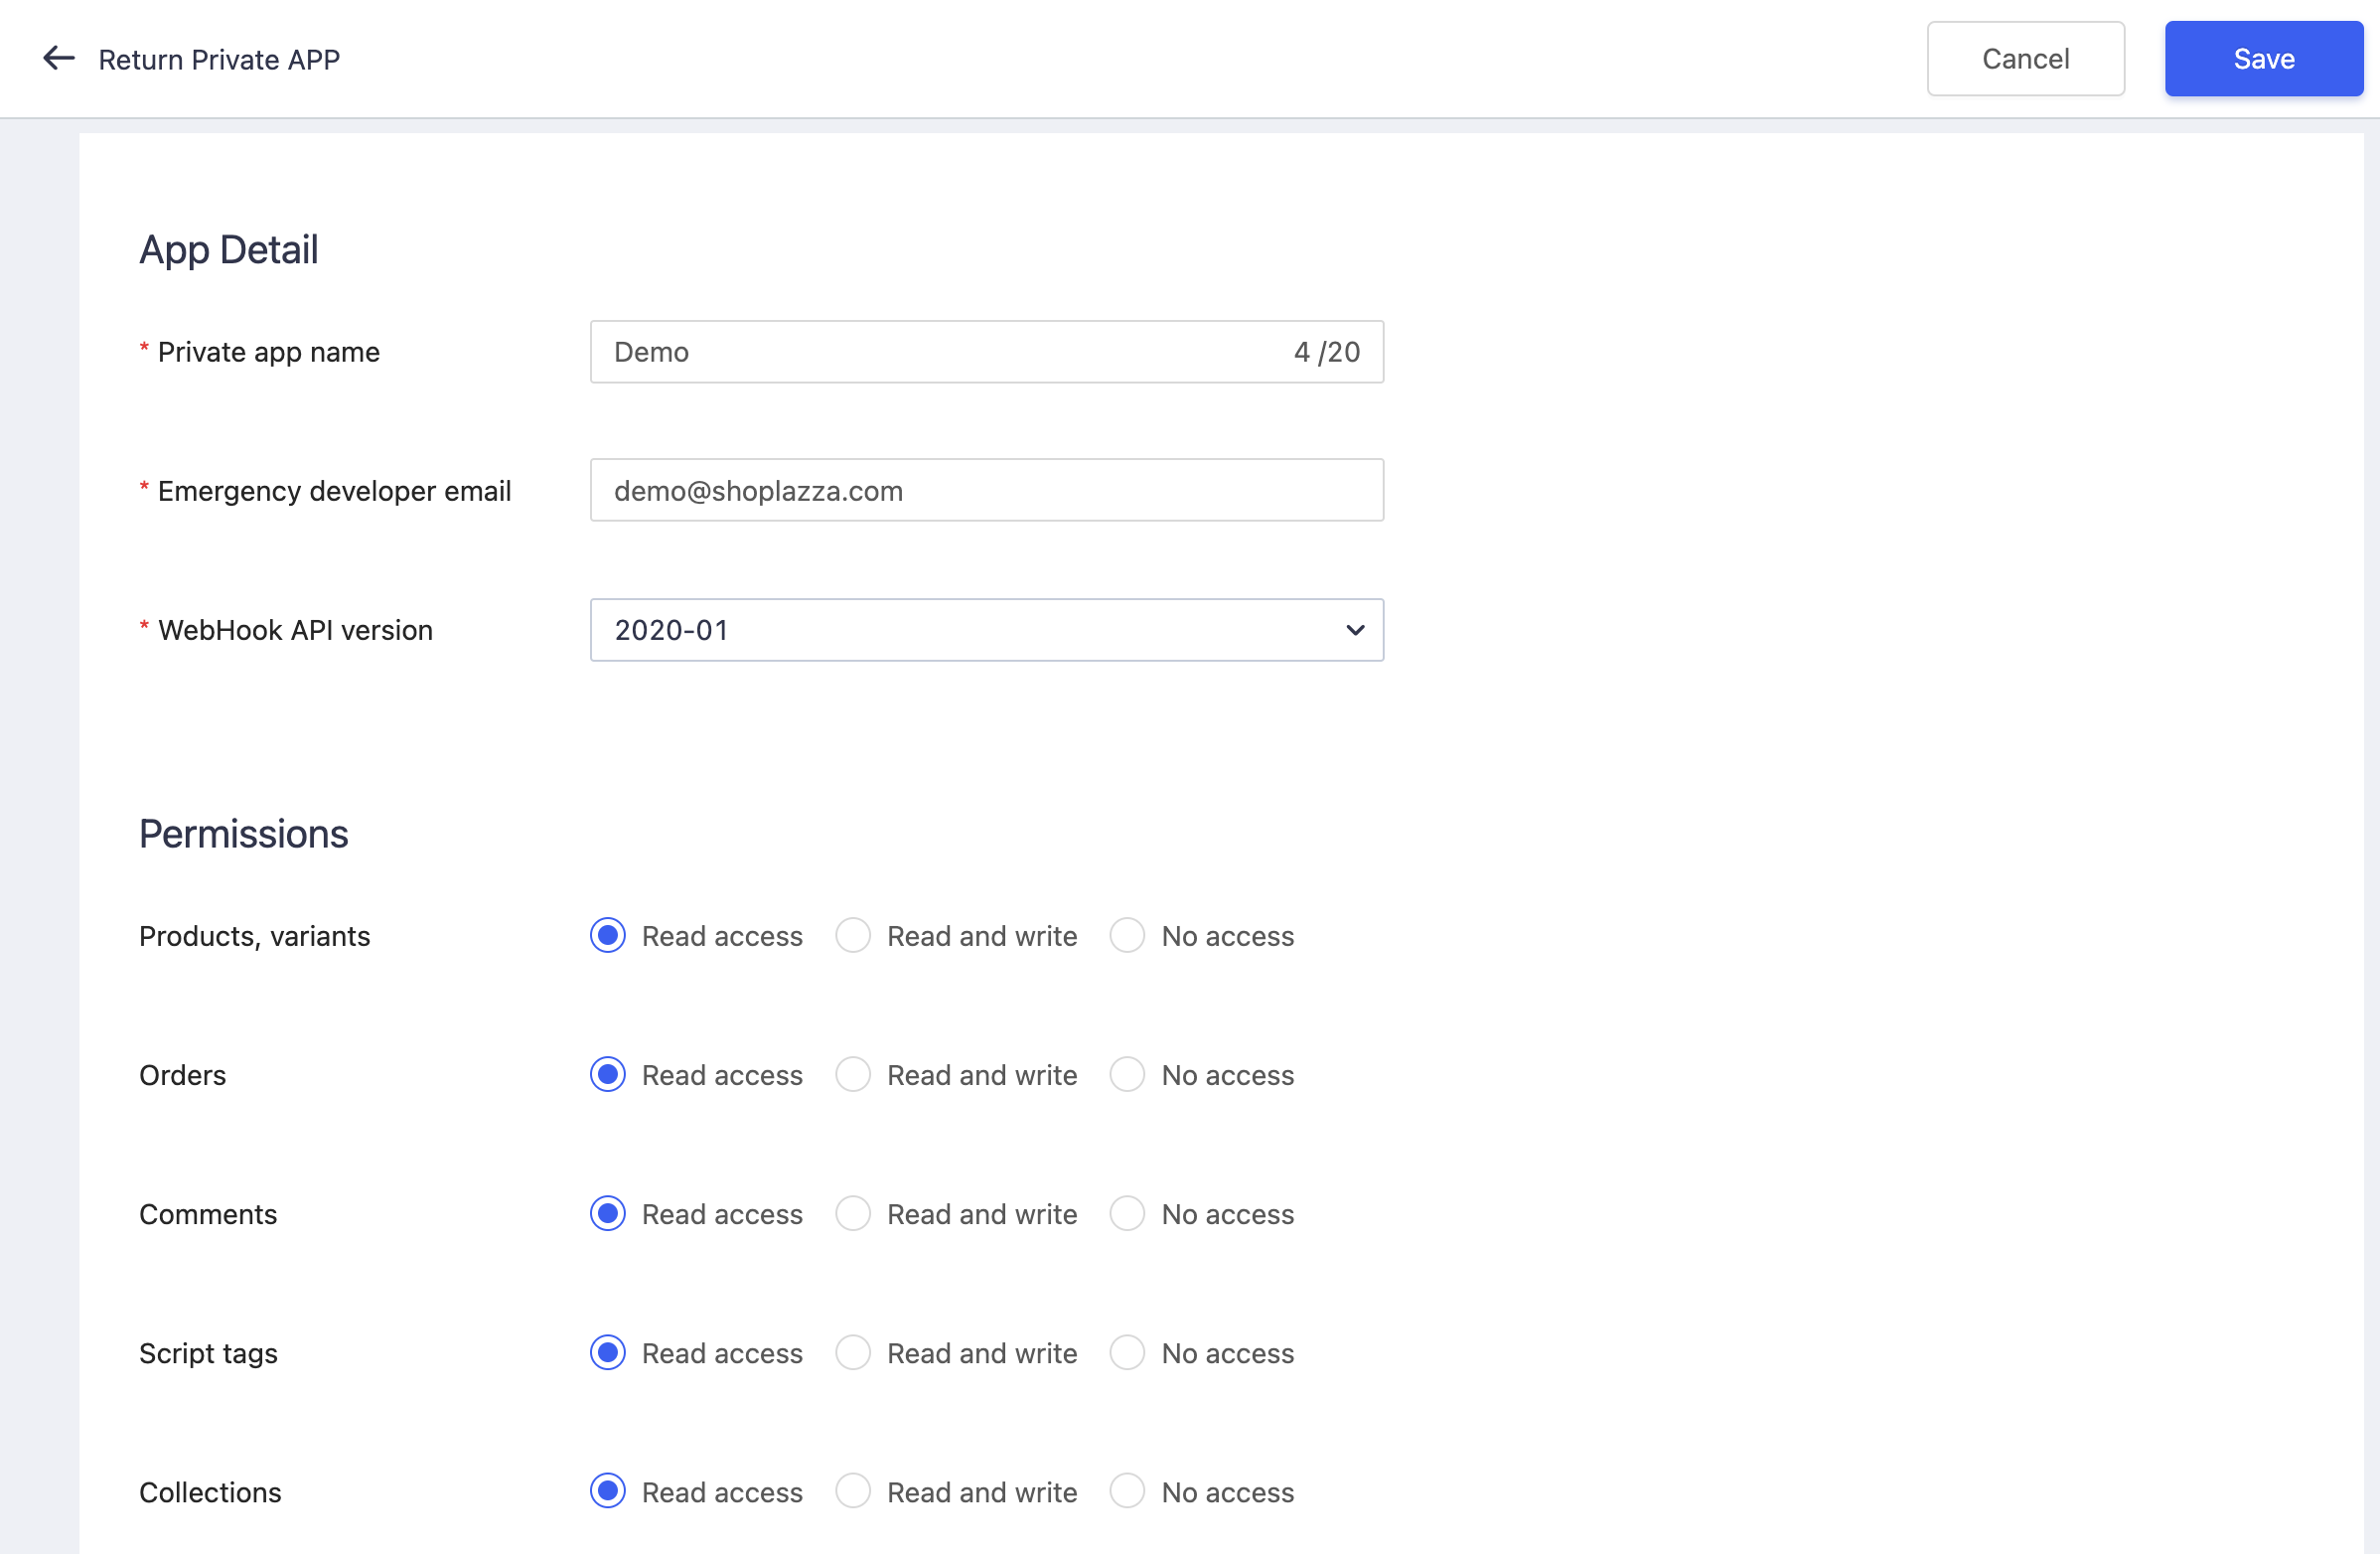
Shoplazza requires private app to have Access Token authentication before it can use Shoplazza Open API.. Therefore, before you start the public development phase, you need have ask merchants to complete the following steps to create an private app for you in Shoplazza Store Admin:
- Log in to Shoplazza Store Admin.
- Click Manage Private Apps.
- Click Create app.
- Enter the Private app name, Emergency developer email, select the Webhook API version and Permissions for your app.
- Click Create.

Private app field definition
To create a private app you need to fill in the following information:
| Field | Definition | Use of |
|---|---|---|
| Private app name | The name of the private app | Identify which private app in private app list in Shoplazza Store Admin - Private Apps |
| Emergency developer email | The email of the app developer | For merchants or Shoplazza platform to contact the private app developer if any emergency bug occured in private app. |
| Webhook API version | The webhook API version of the private app | Private app using the webhook to receive the event callback from merchants store initiated by Shoplazza Platform. Refer to Webhook to know more |
| Permissions | The permissions of the private app can use in Open API | Merchant should carefully control the permissions of the private app for the security concerns. Refer to Access Scopes |
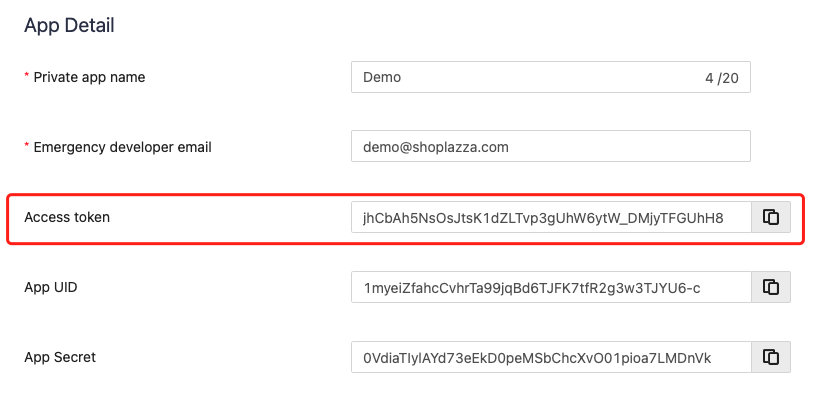
After the private app is created, you should ask merchants to provide the private app Access Token to you, so you can start developing the private app by making authenticated request to Shoplazza Open API.

Note
Private app must have Access token before it can make authenticated request to Shoplazza Open API, refer to Access Token to learn more.
